If you missed the kitchen when I posted it yesterday,
here it is.
We have a really open floor plan, so the kitchen, dining, and living rooms are basically just one big room. But I'm posting them individually so this post isn't a mile long. :)
 |
| That wreath came crashing down a couple days after this picture was taken. And those trees didn't end up staying there once my nativity barn was added...but it's still a nice picture. :) |
 |
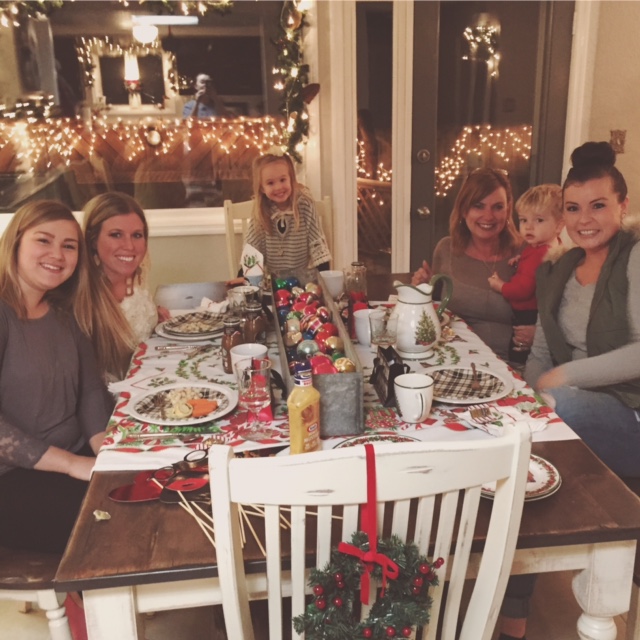
| Favorite addition this year! Baby wreaths on the backs of our new dining room chairs! I eventually added three berry sprigs to each wreath. |
 |
| I love my vintage table cloth, but sometimes it's just easier to eat from and clean up a bare table. I did a little bit of both this year. |
 |
| I like to keep my centerpiece LOW so I'm not constantly having to relocate it whenever we host something. This is a trough we found at our barn, and it's wonderfully skinny, low, and useful (for both decor and beverage serving). |
 |
| Here's a pic of my baby wreath with berries! I also like to add a little 'gift' to each place setting when we host something 'special.' These girls each went home with a galvanized last name initial ($1.50 from Hobby Lobby). If it's a bigger group I'll do a piece of chocolate or a candy cane...our connection group couples each went home with a mini tree globe! |
 |
| Here's the beautiful barn Jamie had custom-made for me for my birthday! It's PERFECT for my Willow Tree nativity and I love that the garland lights it up so well. The Hymnal wreath is one of the things in our house I get the most comments and questions on...so maybe I'll need to post a tutorial on those soon. |
 |
| Christmas in our house is pretty during the day, but I find it to be simply magical at night. :) |
 |
Here's that cute little brush tree globe I was talking about.
Step 1: Buy jars/brush trees (both insanely cheap at Wal-Mart), epsom salt, and glitter
Step 2: Pour glitter and salt into jar
Step 3: Hot glue brush tree to metal lid
Step 4: Screw the 'tree lid' on the jar, gently tip upside down
Step 5: Add twine or ribbon, and give away! |
 |
| Don't be fooled...there's a nice layer of pine cones and vintage tinsel under all those ornaments...but I love how flashy and simple this centerpiece is. |
 |
| And here is sweet LittleMav enjoying his after-nap-snack in his favorite spot. ;) |
Tomorrow the bathrooms are up! ...which should be some good motivation for me to get them cleaned before I snap some pictures for you. :)
MmB


No comments:
Post a Comment